Introduction
Why should we use Arduino
Arduino is one of the greatest and easiest ways to start working with electronics. It has a large and supportive community with tons of examples and projects. It has been a go-to for most of the hobbyists, and it has so many use cases at an industrial level. We can do so many fascinating projects with it, from beginner to advanced levels. To name a few, we can start with a simple Blink LED Project, and Traffic light controller. For more intermediate projects, we can mention:
- Smart Plant Watering system: Check the moisture and pump the water.
- Automatic Night Lamp: Use a light sensor to turn on the light when it’s dark.
- Distance measurement: Use a distance measurement sensor and report the output.
If we want to be more advanced, we can mention:
- Robotics: Controlling motors, sensors, etc., and getting commands from other sources.
- Home Automation: Control lights, fans, and connect them to apps.
- Weather station: Check various sensors like (temperature, humidity, e.t.c) and log it.
- IOT projects: Use WI-FI modules to send the sensor outputs to the cloud.
- Wearables: Smartwatches, fitness trackers, etc.
What is Arduino
Now we know what can be done with Arduino, it is time to understand it better. Arduino is an Open-source electronics platform. It consists of both easy-to-use hardware (like Uno, Nano, Mega, etc.) and software (Arduino IDE). It is known as one of the best tools for learning electronics.

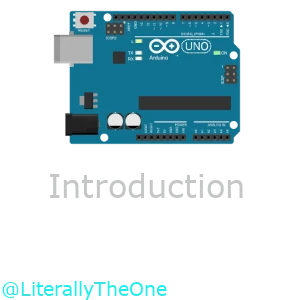
In the image above, you can see an Arduino UNO board, which is the main focus of this tutorial. As you can see, on the Arduino UNO’s board, we have a microcontroller. This microcontroller is an AVR microcontroller, called ATMEGA328P. Arduino has made a really great and super-easy-to-use framework for AVR Microcontrollers that we are going to use mostly in this tutorial. At the top of this image, you can see there are 14 pins that we can use for digital input and output (D0-D13). Also, there are 6 pins at the bottom of this image that we can use for analog input and output (A0-A5). These pins are called General-Purpose input/output (GPIO).
Blinking LED
Let’s start with a simple project as a Hello World. The goal of this project is to connect an LED to an Arduino UNO in our simulation and make it blink with a certain frequency.
Put an LED on the Board
At first, let’s light up an LED in SimulIDE. To do so, we can follow these steps:
- Open up SimulIDE.
- On the left panel, drag an LED (Outputs/Leds/LED) and put it on the board.
- On the left panel, drag a Fixed Voltage (Sources/Fixed voltage) and put it on the board.
- On the left panel, drag a Ground (Sources/Ground) and put it on the board.
- On the left panel, drag a Resistor (Passive/Resistors/Resistor) and put it on the board.
- Connect the Fixed Voltage to one of the pins of the Resistor.
- Connect the other pin of the Resistor to the anode (the longest pin) of LED.
- Connect the Ground to the cathode (the shortest pin) of LED.
- Click on the Fixed Voltage to turn it on.
- Press Start simulation in the top panel.
You should have an output like below:

In the image above, we have an LED that we can control the state of it using the button on the Fixed Voltage.
Connect LED to Arduino
Now, let’s put an Arduino Uno on the board and control the state of LED by that. To do so, we can follow these steps:
- In the left panel, drag an Arduino UNO (Micro/Arduino/Uno) and put it on the board.
- Disconnect the Fixed voltage from the Resistor and connect it to RST.
- Let the Fixed voltage to be on.
- Connect pin of Resistor which was connected to the anode of the LED, to the pin 13.
You should have something like this:

Create a PlatformIO project
Now, let’s create a PlatformIO project to be able to program our Arduino. To create a new project, you can follow these steps:
- Open VS Code
- Click on PlatformIO on the left panel
- Click on New project, A window opens up for you with the title of project wizard
- In the name section, enter the name of your project
- In the Board section select Arduino Uno
- In the Framework section select Arduino
- Click on the Finish button.

Now you have a project.
In the src directory, you have a file called main.cpp.
This file is the file that we are going to write our code in.
In this file, you have content like below:
#include <Arduino.h>

// put function declarations here:
int myFunction(int, int);

void setup() {
  // put your setup code here, to run once:
  int result = myFunction(2, 3);
}

void loop() {
  // put your main code here, to run repeatedly:
}

// put function definitions here:
int myFunction(int x, int y) {
  return x + y;
}
We only need setup and loop functions, so we are going to remove the rest
of it to have a code like below:
#include <Arduino.h>

void setup()
{
}

void loop()
{
}
setup only runs at the start of our program for one time.
It is like an initialization.
loop works like a while true.
It’s always running, and we are going to put the logic of our program on it.
Write the code for the blinking LED
Now, we are ready to write our code. First thing that we should do is to set the pin mode of pin 13, to output. To do so, we can use the code below:
pinMode(13, OUTPUT);
This code should be run only once at the start of our program.
So, we should put it in the setup.
Now, let’s write the blinking process.
To do that, we can use a function called digitalWrite.
It takes a pin and a Value.
So, if we write digitalWrite(13, HIGH), it would turn on the LED,
and if we write digitalWrite(13, LOW), it would turn the LED off.
Let’s put some delay between them, and we have a code like below:
digitalWrite(13, HIGH);
delay(500);
digitalWrite(13, LOW);
delay(500);
As you can see, the code above is the logic of our program,
So, we should put that on the loop function.
As a result, our complete code would look something like this:
#include <Arduino.h>

void setup()
{
  pinMode(13, OUTPUT);
}

void loop()
{
  digitalWrite(13, HIGH);
  delay(500);
  digitalWrite(13, LOW);
  delay(500);
}
Build and upload firmware
Now, let’s build our project and see the result on our simulation.
To build our PlatformIO project, we can use the tick button on the top right or bottom left of
VS Code.
When it is built successfully, there would be a firmware.hex file in .pio/build/uno/.
We need that file to upload to our simulation.
To do so, we can follow these steps:
- Go to the SimulIDE.
- Right-click on
Arduino Uno. - In
mega328, click on load firmware. - Select the path to the
firmwarethat you have built previously (You might need to show hidden files). - Press start simulation.
You should have an output like below:

Conclusion
In this tutorial, we have introduced Arduino. Then we built a Hello World project that showcases how we can make a Blinking LED. In the future, we are going to learn more about GPIO, and we do more complicated projects together.